|
I'M SORRY TO SAY THIS WEBSITE WILL
NO LONGER BE ACTIVE EFFECTIVE 1 JUNE 2024. I HAVE A NEW WEBSITE SET UP - PLEASE FOLLOW THIS LINK HERE: https://www.cardsnstuffwithgail.com/ Follow this link to my shop: https://www.cardsnstuffwithgail.com/shop Thank you so very much for continuing to follow me, Gail xx
0 Comments

Hello and welcome back to my blog,
I've been busy the last few days designing these ten (10) cards using some new products from the Stampin' Up! 2024-2025 Annual Catalogue, including 4 of the 5 new In-Colors, and also incorporating some favourite retired products. As you can see, the designs are all very different and I have combined heat embossing, dry embossing, background stamping and lots of die-cutting, and have used every pattern in the Unbounded Beauty DSP. 


If you would like the instructions for these cards, the tutorial is now available Worldwide using Imperial measurements.
AUD$25.00
Download information:
Once your payment has been approved in Paypal, click on the “Return to Merchant” button for access to your download - "You can download your purchased item(s) below:" Always Save the file to your device for future use - you only have 7 days to do this. You will also receive an email confirmation where you can “View Purchase Online” and access the download.
Cheers,

Product List

Today I bring you another project using some fabulous new items from the Stampin' UP! 2024-2025 Annual Catalogue.
Today's cards are a collection of ten (10) designs using the Thoughtful Journey 6" x 6" DSP - every sheet is another spectacular design in stunning colours. 
To maximise each design, I went through all my dies in search of frames that would showcase each pattern.
Other new products used are:
If you would like the instructions for this card kit, please click the "Buy Now" button below.
The tutorial is now available Worldwide using Imperial measurements. AUD$20.00
Download information:
Once your payment has been approved in Paypal, click on the “Return to Merchant” button for access to your download - "You can download your purchased item(s) below:" Always Save the file to your device for future use - you only have 7 days to do this. You will also receive an email confirmation where you can “View Purchase Online” and access the download.
Cheers,

Product List

Can't believe this last year has flown by and here we now have anew Stampin' UP! Annual Catalogue filled with loads of gorgeous products...

As part of my pre-order, I was lucky enough to get my hands on the Country Woods Suite Collection - the first products that captured my heart.
In creating these six (6) cards, I was able to use a little of everything to create some unique designs.
My coordinating colours are Misty Moonlight, Petal Pink and Pool Party, with a splash of Smoky Slate (product list at the end of this post).
If you would like the instructions for these cards, please click the "Buy Now" button below.
The tutorial is now available Worldwide using Imperial measurements. AUD$20.00
Download information:
Once your payment has been approved in Paypal, click on the “Return to Merchant” button for access to your download - "You can download your purchased item(s) below:" Always Save the file to your device for future use - you only have 7 days to do this. You will also receive an email confirmation where you can “View Purchase Online” and access the download.
Cheers,

Product List

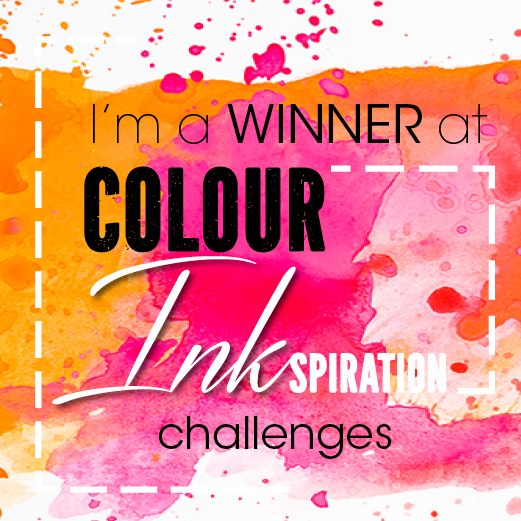
I was delighted to be chosen the winner of the Colour INKspiration challenge #160 (see original post here), and I was asked if I would like to be a future guest designer.

I couldn't believe how lucky I was to be chosen for this specific challenge - these colours are definitely "me" colours.

I was feeling quite nostalgic and chose my all-time favourite, now sadly retired after 20 years, the "Lovely as a Tree" stamp set.
The technique I used for the background was applying the inkpads directly to a large acrylic block, spritzing with water and stamping onto a piece of watercolour paper to transfer the colours. I set it aside to dry then stamped the trees with Early Espresso and die-cut with the Deckled Rectangles Dies. 
If you would like to participate in future challenges, follow this link to the Colour INKspiration Facebook group.
Cheers,

Product List

Hello and welcome,
I've been hard at working designing this new "super easy-make in 10 minutes" mini album. All you need is 2 pieces of thin chipboard, 6 pieces of cardstock - all trimmed to the same size - and 6 pieces of cardstock for the "hinges" - it's just too easy! When all the pieces are assembled, you get this "fan like" album - ready for embellishing the pages. 
I have used the Nature's Sweetness 12" x 12" DSP, paired with black, white and gold foil.
The tutorial is now available worldwide in Imperial measurements and
includes a link to an exclusive YouTube video tutorial. If you would like to purchase the tutorial, please click the "Buy Now" button. AUD$30.00
Download information:
Once your payment has been approved in Paypal, click on the “Return to Merchant” button for access to your download - "You can download your purchased item(s) below:" Always Save the file to your device for future use - you only have 7 days to do this. You will also receive an email confirmation where you can “View Purchase Online” and access the download
Cheers,

Product List

Hello stampin friends,
Today I wanted to revisit some of our retired products, while pairing these items with the retired "By The Bay" DSP and some other current products. I started by trimming all the DSP I wanted to use into strips of 2" long. From there, I pulled out lots of dies and just started die-cutting using Basic White, Night of Navy, Balmy Blue and Crumb Cake (see full product list at the end of this post). The final collection of cards designed are set of six (6) cards; two of which are fun folds and four standard sized cards. As always, you can substitute where necessary.
The tutorial is now available worldwide and with Imperial trimming dimensions for both Australia/UK and US/Canada with a complete supply list.
All the designs are exclusive to Cards 'n Stuff with Gail and I ask they please not be shared. AUD$15.00
Download information:
Once your payment has been approved in Paypal, click on the “Return to Merchant” button for access to your download - "You can download your purchased item(s) below:" Always Save the file to your device for future use - you only have 7 days to do this. You will also receive an email confirmation where you can “View Purchase Online” and access the download
Cheers,

Product List

Hello everyone
Continuing on from my latest project, the Gatefold Mini Album I posted a day or so ago, I decided to make a set of coordinating "gatefold" cards. I have used all the same products to design the following four cards in the set:
and to give you a closer look at each card, here is a quick video, followed by details on how you can purchase the 16-page tutorial:
Each tutorial includes step-by-step instructions, multiple images, diagrams, trimming dimensions (Imperial), and a complete supply list.
All the designs are exclusive to Cards 'n Stuff with Gail and I ask they please not be shared. PDF purchases are available worldwide. AUD$20.00
Download information:
Once your payment has been approved in Paypal, click on the “Return to Merchant” button for access to your download - "You can download your purchased item(s) below:" Always Save the file to your device for future use - you only have 7 days to do this. You will also receive an email confirmation where you can “View Purchase Online” and access the download.
Cheers,

Product List

Hello and welcome
Today I'm sharing my latest mini album tutorial. This project took me a week to design and put together, and I'm really happy with the end result - it was definitely a "labour of love". The finished album measures 6 1/2" wide x 6 1/4" high x 1 3/4" deep and is filled with 6 double sided pages to decorate, on panels of Nature's Sweetness DSP and Softly Stippled DSP. The cover is held together with a flap and magnets, inside the back page I have added a pocket. I kept to neutral tones to allow any coloured photos to be added, with lots of stamped and die-cut foliage and flowers on each page. You can find a full product list at the end of this post. Here is a sneak peek of the entire album:
The full-colour PDF tutorial is now available for purchase with an immediate download, and includes an exclusive YouTube video tutorial link
The tutorial uses Imperial measurements and is available worldwide. AUD$40.00
Download information:
Once your payment has been approved in Paypal, click on the “Return to Merchant” button for access to your download - "You can download your purchased item(s) below:" Always Save the file to your device for future use - you only have 7 days to do this. You will also receive an email confirmation where you can “View Purchase Online” and access the download.
Cheers,

Product List

Following on from yesterday's blog post, I have another card for a different challenge, and this one is a sketch challenge for the Global Design Project:

For this card, I used the retired Layering Squares Dies and embossed the squares with the Fun Patterns Embossing Folder (exclusive on-line product available 5 March) and attached each to a scalloped square in each colour.

For my pop of colour, I used Bubble Bath and Highland Heather to colour the leaves from the Layering Leaves Stamp Set and used the coordinating Bough punch.
A simple layer of Basic Black with a Basic White Stitched Rectangle on top, with a few scattered sequins and mounted sentiment completes the card. 


Product List
|
Archives
May 2024
Categories
The content of this website is the sole responsibility of Gail Ellis, Independent Stampin' Up! Demonstrator. The use of and content of the classes, services, or products offered on this website is not endorsed by Stampin' Up! Some stamped images on this site are copyright Stampin' Up! 1990-Current. Designs on this page are copyright Gail Ellis unless otherwise attributed. I am honoured and happy if you like my cards and ideas and want to CASE, all I ask for is a link back to my original post (or even just my blog) and a credit where you publish. My intention is always to give credit when inspired by others - apologies for any omissions. All designs and tutorials are for your personal inspiration only. Thank you for respecting these guidelines. Much appreciated! |

 Designer Series Paper")

")
")


")
")


")

 Specialty Designer Series Paper")


")


 Specialty Designer Series Paper")


 Wavy Trim")

 Designer Series Paper")


")

")


")


")


 RSS Feed